FILTER PRODUCTS

Select a category above to apply technical filters

Optical Metrology Equipment

Kaleo Kit is a modular system for optics qualification. It combines a broad range of compatible modules, that let you create a cost-effective, compact, and easy-to-use system that can adapt to a wide range of measurement configurations and ensure the quality of your sample at all development stages. Access all the characteristics of ...

Specifications

Interferometer Configuration: Not Specified
Light Source: 543nm, 594nm, 632 nm or 633nm, 1550nm, 1064nm, 1053nm, 780nm, 532nm, 355nm
Output Polarization: Not Specified
RMS Repeatability: Not Specified
RMS Precision: Not Specified
Data Sheet
Phasics is innovating in optical metrology with a new instrument able to measure both transmitted and reflected wavefront error (TWE/RWE). Coated and uncoated optics can be qualified over a diameters from 30 to 150 mm at their working wavelengths. The Kaleo MultiWAVE is an advantageous alternative and cost-effective solution to the ...

Specifications

Interferometer Configuration: Not Specified
Light Source: 543nm, 594nm, 632 nm or 633nm, 1550nm, 1064nm, 1053nm, 780nm, 532nm, 355nm
Output Polarization: Not Specified
RMS Repeatability: Not Specified
RMS Precision: Not Specified
Data Sheet
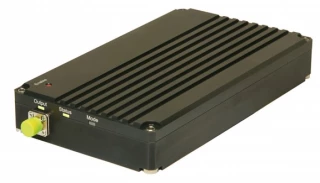
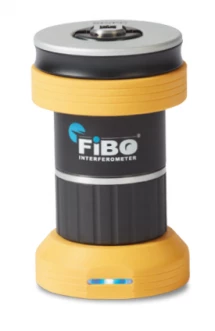
FiBO® 200 Interferometer is an economical solution for complete and accurate fiber optic connector end-face testing. High resolution 3D surface metrology and automated defect detection are combined in one robust, compact system for quick and easy inspection on the production floor or in the field.

Specifications

Interferometer Configuration: Michelson Interferometer
Light Source: 532nm, 355nm
Output Polarization: Not Specified
RMS Repeatability: Not Specified
RMS Precision: Not Specified
Data Sheet
ContourX-100 3D Optical Profilometer
Bruker Nano Surfaces
The ContourX-100 Optical Profilometer sets a new benchmark for accurate and repeatable non-contact surface metrology at a best-in-class price point. The small footprint system offers uncompromised 2D/3D high-resolution measurement capabilities in a streamlined package that incorporates decades of proprietary Bruker white light ...

Specifications

Measurement Technique:
Light Source Type: CW LED, Modulated LED
Light Source Wavelength: -- nm
Sample Reflectivity: 0.05-100%
Vertical Range: 10000000 nm
...
Data Sheet
The NanoCam Sq dynamic optical profiler measures surface roughness on supersmooth optics and precision surfaces. The non-contact NanoCam Sq is a vast improvement over the messy replication methods required with traditional workstation optical profilers and provides excellent portability for measuring large optics. By enabling ...

Specifications

Measurement Technique: Confocal Microscopy
Light Source Type: Pulsed LED
Light Source Wavelength: 460 nm
Sample Reflectivity: 1-100%
Vertical Range: 115 nm
...
Data Sheet
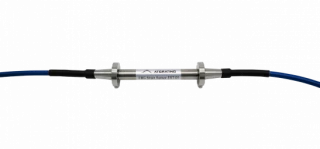
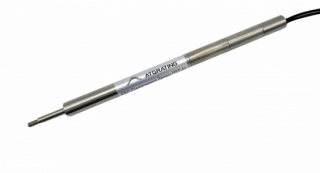
The os3100 Optical Strain Gage is designed to make fiber handling easy and sensor installation fast and repeatable. Its stainless steel carrier holds the FBG in tension and protects the fiber during installation. Since there are no epoxies holding the fiber to the carrier, long term stability is ensured by design. For ...

Specifications

Strain Sensitivity: 1.4 pm/με
Gage Length: 22 mm
Operating Temperature Range: -40-120deg C
Strain Limits: -2,500-2,500με
Data Sheet
Optimized for outdoor installations on steel structures, the os3150’s stainless steel carrier holds the FBG in tension and protects the fiber during installation. Since there are no epoxies holding the fiber to the carrier, long term stability is ensured by design. For temperature compensation, the os3150 may be connected in ...

Specifications

Strain Sensitivity: 1.4 pm/με
Gage Length: 75 mm
Operating Temperature Range: -40-80deg C
Strain Limits: -2,500-2,500με
Data Sheet
Optimized for outdoor installations on steel structures, the os3155’s stainless steel carrier holds the FBG in tension and protects the fiber during installation. Since there are no epoxies holding the fiber to the carrier, long term stability is ensured by design. The design is similar to the os3150 rugged strain gage but the ...

Specifications

Strain Sensitivity: 1.2 pm/με
Gage Length: 50 mm
Operating Temperature Range: -40-80deg C
Strain Limits: -2,500-2,500με
Data Sheet
The os3200 is based on fiber Bragg grating (FBG) technology. It has a self adhesive backing that holds the sensor body in place and protects the FBG while epoxy is injected. The epoxy encapsulates the FBG and bonds it to a structure’s surface. Installation time is just a few minutes. Measurements can be taken after the epoxy ...

Specifications

Strain Sensitivity: 1.2 pm/με
Gage Length: 10 mm
Operating Temperature Range: -40-80deg C
Strain Limits: -5,000-5,000με
Data Sheet
The os3500 Embeddable Strain Sensor measures average strain over the length of the gage while providing integrated temperature compensation. It is based on fiber Bragg grating (FBG) technology. The os3500 is intended exclusively for embedding in concrete structures. Disk ends form a solid bond to surrounding concrete or grout. A ...

Specifications

Strain Sensitivity: 1.2 pm/με
Gage Length: 110 mm
Operating Temperature Range: -40-80deg C
Strain Limits: -2,500-2,500με
Data Sheet
The os3600 is based on fiber Bragg grating (FBG) technology and is available two gage lengths of 25 or 100 cm. It is intended exclusively for embedding in concrete structures. Disk ends form a solid bond to surrounding concrete or grout. Universal ends allow the user to employ bolt-on, weld-on, or custom end brackets for attachment ...

Specifications

Strain Sensitivity: 1.2 pm/με
Gage Length: 250 mm
Operating Temperature Range: -40-80deg C
Strain Limits: -2,500-2,500με
Data Sheet
The os3610 is based on fiber Bragg grating (FBG) technology and is available two gage lengths of 25 or 100 cm. It is intended exclusively for surface mounting. Each end of the os3610 is attached to the structure via rigid brackets that are either welded, bolted, epoxied, or grouted to the surface of a concrete, rock, steel, ...

Specifications

Strain Sensitivity: 1.2 pm/με
Gage Length: 250 mm
Operating Temperature Range: -40-80deg C
Strain Limits: -5,000-5,000με
Data Sheet
OFH has extensive expertise in 3D mapping, distance measurement,  and have worked on LIDAR, stereo imaging, time of flight,  computational photography, light coding, structured illumination, and many more methods. Our clients have sold millions of units and are global leaders in robotic vision.  

Specifications

Light Source Type: Modulated Laser
Light Source Wavelength: 650 nm
Sample Reflectivity: 10-90%
Vertical Range: 10 nm
Data Sheet
The Optical Engineer Companion is an optical metrology system comprising compatible and complementary optical hardware, software and accessories. It spans 800+ combinations and covers a wide range of uses and applications. The Companion’s modularity and clever design enable snap reconfigurations to switch between setups and ...

Specifications

Interferometer Configuration: Not Specified
Light Source: 1550nm
Output Polarization: Not Specified
RMS Repeatability: Not Specified
RMS Precision: Not Specified
...
Data Sheet
MESO metrology system is a one-stop solution to many challenges in optical metrology. Shop floor measurements ensure quality control testing and in situ process control of your flat optics right next to the manufacturing line. A unique instrument allows to measure at several different wavelengths with no chromatic abberrations and ...

Specifications

Interferometer Configuration: Not Specified
Light Source: 1064nm
Output Polarization: Linear, Circular
RMS Repeatability: Not Specified
RMS Precision: Not Specified
...
Data Sheet
The CaliBall II is used in horizontal interferometer set ups and is held in a Zygo type 4” bayonet mount that provides the adjustments to align the CaliBall II to the transmission sphere.     The CaliBall™ II comes with all the same components as CaliBall™ I but it is better suited for use with horizontal looking ...
Data Sheet
The Calibration Package for PSM is a product offered by Optical Perspectives Group (OPG) that provides a NIST traceable square wave grating with 4 lp/mm spacing for calibrating the lateral scale of the PSM and other optical instruments. The package includes a 64 mm square glass substrate with a 25 mm square chrome square wave line ...

Specifications

Grating Spacing: 4 lp/mm
Glass Substrate Size: 64 mm square
Square Wave Pattern Size: 25 mm square
Calibration Certificate: Included
Calibration Data Sheet: Included
Data Sheet
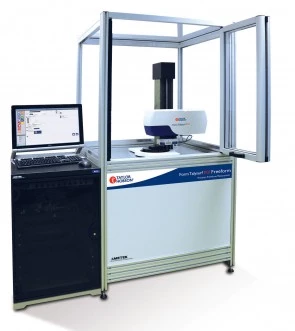
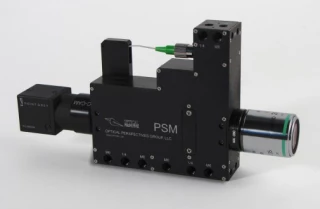
The PSM is an unusually flexible optical test instrument with many unique features that set it apart from other optical test instruments. This is why we call it the “Swiss Army Knife” of optical instruments.  As opposed to most optical test instruments, the PSM is lightweight and has a small physical footprint. This means ...

Specifications

Number Of Axes: Single-Axis
Min Part Size: 17 mm
Max Part Size: 170 mm
Data Sheet
The Optical Frequency Comb Sources manufactured by Pilot Photonics in Ireland are non-contact inspection tools used in optical metrology. They provide high-precision, high-resolution measurements for various applications, including sensing, spectroscopy, and telecommunications. These sources generate a series of optical frequencies ...

Specifications

Comb Spacing: 2500 MHz
Center Wavelength: 1550 nm
Oscillator Spectral Range: >10 nm
Comb Wavelength Range And Options: 500 - 1050 nm, 1050 - 2100 nm, 530 - 1080 nm, 500 - 1100 nm
Data Sheet
Triton312 Triple-Axis Scanning Laser Micrometers
LaserLinc Inc
Triple-axis (also called triple-plane) models make measurements from three viewpoints.  The three axes of measurement are coplanar and separated by 60 degrees from each other. The product to measure is perpendicular to the measurement field.  (See the associated image.)   Typically, the micrometer is used to ...

Specifications

Number Of Axes: Triple-Axis
Min Part Size: 0.102 mm
Max Part Size: 11.4 mm
Data Sheet
The FC1500-ULNnova is Menlo System’s latest optical frequency comb synthesizer for ultimate performance. The core of the new model consists of a redesigned comb oscillator, based on the patented ultra-low-noise (ULN) figure 9® mode locking technology. The enhanced design of this so-called ...

Specifications

Comb Spacing: 250 MHz
Center Wavelength: 1560 nm
Oscillator Spectral Range: >25 nm
Comb Wavelength Range And Options: 500 - 1050 nm, 1050 - 2100 nm
Data Sheet
All your comb applications at your fingertips: SmartComb is an optical metrology system in a revolutionary compact package. In just 19” 3U it features the first fully automated turn-key optical frequency comb designed and built for use both in- and outside the optics lab. It measures your optical frequency anywhere between ...

Specifications

Comb Spacing: 100 MHz
Center Wavelength: 1550 nm
Oscillator Spectral Range: >25 nm
Comb Wavelength Range And Options: Not Specified
Measurement Wavelength: choose one in the 630-2000 nm range
Data Sheet
Frequency comb technology makes direct measurement of absolute optical frequencies possible. The FC1000 Optical Frequency Synthesizer is a compact, portable and flexible fiber-based femtosecond frequency comb system. The system is capable of providing at the same time a source for frequency metrology in both the visible and the ...

Specifications

Comb Spacing: 250 MHz
Center Wavelength: 1040 nm
Oscillator Spectral Range: >20 nm
Comb Wavelength Range And Options: 530 - 1080 nm
Data Sheet
The FC1500-ULNplus Ultra Low Noise Optical Frequency Comb brings the system performance to the next level. Additional hardware, optimized components and engineering ingenuity resulted in a perfect flywheel for transferring frequency stability between two or more user-defined frequencies at the 10−19 level. This exceeds the ...

Specifications

Comb Spacing: 250 MHz
Center Wavelength: 1560 nm
Oscillator Spectral Range: >25 nm
Comb Wavelength Range And Options: 500 - 1050 nm, 1050 - 2100 nm
Data Sheet
3DScope-V2 Interferometer
Connected Fibers
Specifically designed for use in a production environment, 3D Scope-V2 is a robust, compact and easy to use interferometer that brings speed and precision to operators.  3D Scope-V2 supports our Blink software platform. Non-compressed, real time and high-quality images are transferred from the hardware to the ...

Specifications

Interferometer Configuration: Not Specified
Light Source: 632 nm or 633nm
Output Polarization: Not Specified
RMS Repeatability: Not Specified
RMS Precision: Not Specified
...
Data Sheet

Frequently Asked Questions

Optical metrology is a non-contact measurement technique that uses light to measure the shape, size, and surface characteristics of objects. It includes various methods such as interferometry, confocal microscopy, digital holography, and others.

Optical metrology offers several advantages over traditional contact-based inspection methods, such as high accuracy, fast measurement speed, and non-destructive measurement of delicate and complex surfaces. It is also highly adaptable to different materials and shapes.

Optical metrology has numerous applications in industries such as automotive, aerospace, electronics, and biomedical. It can be used for dimensional measurement, surface roughness analysis, defect detection, and quality control.

The FindLight marketplace includes a wide range of products and services for optical metrology inspection, such as interferometers, confocal microscopes, 3D scanners, software solutions, and consulting services.

Simply enter keywords related to your inspection needs into the search bar on the Non-Contact Inspection page, and filter the results by selecting the Optical Metrology category. The search results will display various products and services offered by companies in the optical metrology industry, along with brief descriptions and links to the product pages.

Findlight's Optical Metrology Inspection Technologies category offers a comprehensive resource for professionals seeking non-contact inspection solutions using optical metrology. This category provides information on various types of optical metrology methods, including interferometry, confocal microscopy, and digital holography, among others. Users can search for relevant products and services by entering keywords related to their inspection needs. The search results display various products and services offered by companies in the optical metrology industry, along with brief descriptions and links to the companies' websites. Whether you need optical metrology solutions for surface characterization, dimensional measurement, or defect detection, Findlight's Optical Metrology Inspection Technologies category has got you covered.
Did You know?

Did you know that optical metrology can be used to measure the thickness of a human hair with a precision of a few nanometers? Optical metrology is a non-contact measurement technique that uses light to capture high-resolution images of an object's surface and analyze its features. Interferometry, one of the optical metrology methods, utilizes the interference of light waves to measure the distance between two surfaces with an accuracy of a few nanometers. Confocal microscopy is another optical metrology method that uses a focused beam of light to capture 3D images of an object's surface with high axial and lateral resolution. Digital holography, on the other hand, captures 3D images of an object's surface by recording the interference pattern of a laser beam reflected off the surface. These optical metrology methods have numerous applications in industry, research, and medical fields, such as in the manufacturing of microelectronics, the inspection of medical devices, and the analysis of biological samples. By providing high-accuracy and non-destructive measurements, optical metrology has become an essential tool for inspection and quality control in many industries.